REGISTER
 SIGN IN
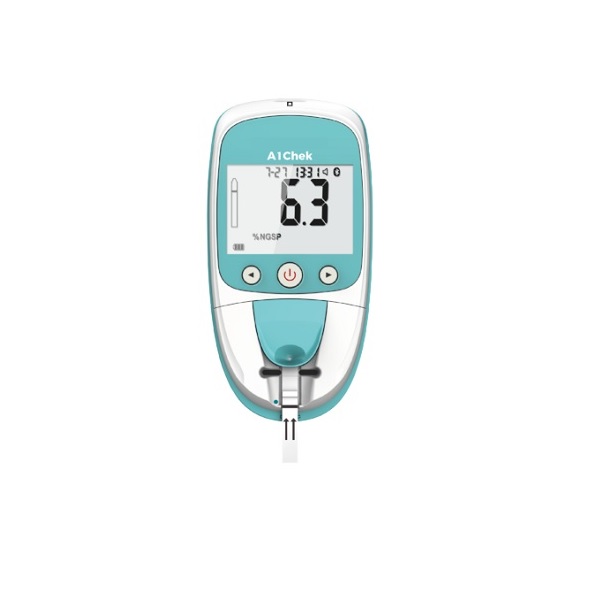
A1Chek
MPIN: MP46771
Sign in to view priceThe A1Chek is Smart HbA1C Meter. This is used to quantitatively measure the concentration of HbA1C in whole blood, suitable for the self-monitoring of HbA1C for diabetes patients.
Ask for Quote
A1Chek
Overview:
The A1Chek is Smart HbA1C Meter. This is used to quantitatively measure the concentration of HbA1C in whole blood, suitable for the self-monitoring of HbA1C for diabetes patients. It helps users to understand their diabetes control status or to monitor their risk of developing diabetes.
The importance of regular monitoring of HbA1C test is that it can help you manage diabetes effectively.

Features
Easy HbA1C testing :
Easy two step testing.
Quick and accurate results :
HbA1C test result within 5 minutes. NGSP and IFCC certified.
Automatic Calibration :
No need of separate calibration. Just insert the chip & done.
Wide operating temperature range :
A1Chek meter comes with wide operating temperature range of 10°C – 40°C
Technology
A1Chek Smart HbA1C Meter is used to quantitatively measure the percentage of HbA1C of human fingertip blood (capillary) or venous blood in total haemoglobin.
This analyzer is applicable to the people who perform HbA1C test, clinical medical professionals and patients with diabetes, high-risk groups.
With less amount of capillary blood used for the test, the A1Chek meter ensures the results are compliant with NGSP and IFCC certifications, the global guideline for HbA1C test accuracy.
How to use
This analyzer to be used to test HbA1C level. The following contents will introduce the test procedures respectively.
Preparation
Have these things ready before testing: Analyzer, test strip, lancet, buffer A, buffer B, Blood sampler, medical alcohol and dry cotton swabs.
Insert the calibration chip
When starting, use a new box of HbA1C test strips, remember to insert the code chip packed with the strips
1. Take out the calibration chip from the HbA1C kit. Compare the code of the chip with that on the vial of strips. If the two codes are different, please contact your local dealer.
2. Before testing, insert the new calibration chip to the strip slot The chip can be inserted whether analyzer is on or off.
3. After code chip is inserted, the screen will display the CODE. If the CODE on the screen is not same as the code on the chip, please contact your local dealer.
Step 1 : Inserting the HbA1C strip.
Turn on the analyzer by pressing OK key and insert the HbA1C test strip. If the HbA1C test strip is not inserted or wrongly inserted (used HbA1C strip), the test strip symbol will blink on the display, as shown below:
If the voice prompt is on, there will be a voice prompting “Please insert the test strip” or “Please insert the correct test strip” correspondingly. If there is still no corrected test strip, inserted, the voice prompt will remind again after 30 seconds.
If you are using a used or polluted HbA1C test strip, the analyzer will make a relevant voice prompt.
Step 2 : Applying Buffer A
When the test strip is inserted correctly, the analyzer will prompt “Please add 3 drops of buffer A”. The buffer A symbol will blink. “-2” and “Add A” will be displayed. This indicates the testing process has entered in to step 2. Add 3 drops of buffer A vertically and continuously to the buffer port. As shown below:
After adding buffer A, the analyzer will detect buffer A automatically. When the detection is successful, analyzer will count down for 10 seconds. If buffer A is not detected or not added, the voice prompt will remind every 15 seconds.
Step 3 : Applying the blood sample
After the 10 second countdown, the analyzer will prompt to add blood sample. The blood sample symbol will also blink. “-3″ and ” Add bld” will he displayed. This indicates the testing process has entered into step 3. Add the blood sample to the sampler port. Remember to keep the sampler in contact with test strip for 3 seconds and then remove it. As shown below:
After adding the blood sample, the analyzer will detect the sample automatically. When the detection is successful, the analyzer will enter a 130 seconds countdown.
Step 4 : Applying buffer B
After the 130 seconds’ countdown, the analyzer will prompt to add 2 drops of buffer B. The buffer B symbol will blink, ” -4″ and “-Add B” will be displayed. This indicates the testing process has entered into step 4. Add 2 drops of buffer B vertically and continuously to the buffer port.
adding buffer B, the analyzer will detect buffer B automatically. It will need about 20s to 50s.
After buffer B being detected, the analyzer counts down for 130 seconds.
Note: During the test process as mentioned above, if the HbA1C test strip is pulled out by mistake, the analyzer will have corresponding prompt.
Reading the result :
The analyzer will make a “Beep” when the countdown is finished. The HbA1C result will be shown in either %NGSP or mmol/mol unit as preset. The following result is shown as %NGSP
Shipping Policy
Orders made at Medpick are initiated and processed for shipment upon receipt of request from the customer. Please note that our Shipping Services (Fee, Transportation, Loss or Damage of any shipment, etc.) are in accordance with the Seller\'s terms of Shipment.
Refund Policy
Please refer to Medpick Return Policy.
Cancellation / Return / Exchange Policy
Please refer to Medpick Return Policy.
Related products
-
Health Innovations, Home Health and Home use innovations, Pregnancy
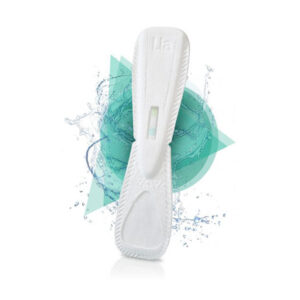
Lia – The flushable pregnancy test
Health Innovations, Home Health and Home use innovations, PregnancyLia – The flushable pregnancy test
There hasn’t been a major update to the pregnancy test in over 30 years–until now. Lia’s breakthrough technology makes it the first and only flushable‡ and biodegradable‡‡ pregnancy test. Lia is engineered to be discreet and good for the environment, without sacrificing accuracy*. The future of pregnancy testing is here.
SKU: MP31380 -
Consumer Goods, Health Innovations, Home Health and Home use innovations, Masks, Personal Hygiene
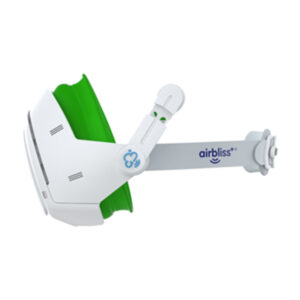
Smart Air Pollution Mask
Consumer Goods, Health Innovations, Home Health and Home use innovations, Masks, Personal HygieneSmart Air Pollution Mask
The World’s Best Smart Air Pollution Mask
- Inhale across the filter like you don’t wear a mask with the breakthrough BreatheEase™ System
- No Inward leakage of bad air or sore skin with the innovative Sealing System
- Reduced heat and Humidity in the inner space of the mask
- Easy-to-buckle and adjustable harness that does not tangle with your hair
SKU: MP27387 -
Health Innovations, Home Health and Home use innovations, Pregnancy
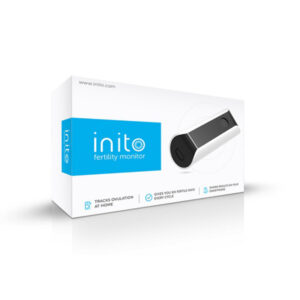
Inito – Fertility Monitor and 10 Test Strips
Health Innovations, Home Health and Home use innovations, PregnancyInito – Fertility Monitor and 10 Test Strips
Inito Fertility Monitor is a smartphone connected device that helps you identify up to 6 fertile days of your cycle. It comes with the Inito App and the Test strips, making it easy and convenient to track ovulation at the comfort of your home.
SKU: MP31698 -